Crisp Chocolate Cookie Recipe:
1 cup butter, softened
2 T shortening, butter flavored is best
1 cup sugar
2 tsp vanilla
1 egg
1 tsp b.p.
1 tsp salt
3/4 cup cocoa powder (I use Guittard dark chocolate cocoa powder)
2 c flour
First things first, preheat your oven to 350 degrees
Then start by mixing the flour, cocoa powder, baking powder and salt together in a bowl. Then cream the butter, shortening and sugar together in a mixer for 1-2 minutes. Then add the vanilla and the egg. Once the liquid elements are thoroughly combined slowly mix in your dry ingredients. You can add them quickly if you want to, but if you do you might end up with a counter covered in flour and cocoa powder like I did.
Once your dough is done mixing it will be a little bit stiff. That is how it is supposed to be. It should not be soft like chocolate chip cookie dough because you are going to roll it out and cut it like a sugar cookie. Now you need to chill the dough. I like to put mine in a gallon size Ziploc bag and smash it into a disc shape in the bag, but you can chill it however you want.
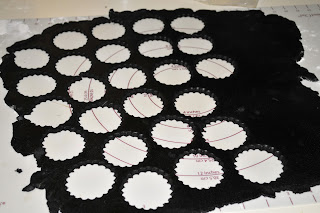
Let the dough chill for at least 30 minutes. Once it is nice and cool and easier to handle, roll it out 1/8 to 1/4 inch thick on a lightly floured surface. Then cut out your cookies with your cookie cutter and place on a lined baking sheet.
You can place them fairly close together because they should not rise very much. You can cut out plain circles, or get fancy with it and cut out any shape you want. I used a two inch cutter for mine and that gave me around 50 cookies, which will give you 25 finished cookies.
Once they are all lined up on the cookie sheet you can do what I did and press a little design into the top of the cookies. I am a cake decorator and therefore have tons of random cake decorating items at my disposal. So when making these cookies I decided to spruce them up by using my Wilton decorative fondant punch. I used it to lightly press the design onto the center of each cookie.
Then bake at 350 for 10-12 minutes, depending on how crisp you want them. Once they are done baking transfer them to a cooling rack and let cool completely.
Now for the Frosting.
Stiff Cream Cheese Icing Recipe:
1 8oz pkg cream cheese - softened
1/2 cup butter - softened
2 tsp vanilla
4-5 cups powdered sugar
This icing is pretty easy. Just mix the softened cream cheese and butter together in a mixer until they are thoroughly combined and then become light and fluffy. That usually takes 3-5 minutes. Then mix in your vanilla and start mixing in your powdered sugar one cup at a time. If you would like a softer icing stop at 4 cups of powdered sugar, if you want it stiffer, use all 5 cups. If you want the icing almost solid like a real Oreo you could even bump it up to 6 cups. My personal preference is 5.
Once your cookies are cool and your icing is made, divide your cookies in half. I like to line them up and flip half of them over. Then spread your icing on one cookie and then cover with a second cookie. How much filling you put in is really up to you. I like my icing to be about as thick as one of the cookies. My husband on the other hand prefers much more icing than that. You can spread the icing on with a knife or use a round tip and a piping bag to swirl it on. Because of my plethora of cake decorating supplies I used a #12 tip to swirl the icing onto the cookie.
I prefer piping the icing on because it goes on fast, and even and clean. I think that is it. Now that they are all iced and sandwiched go ahead and eat up. Because they are nice and crisp like a real Oreo they do really well with a glass of milk.


No comments:
Post a Comment